I tried doing lot of things!! A lot, indeed. Very little help out there on Stack Overflow. So I'm writing this to help developers who are starting with Oracle APEX.
Use Case : Get selected row(s) from a region such as Interactive Grid/Interactive Report. APEX does not provide a declarative way to perform this operation in Javascript. I tried apex.item(), $v() etc. Nothing seemed to work out.
These are the steps I followed to get the selected selected row from the interactive grid in Oracle APEX.
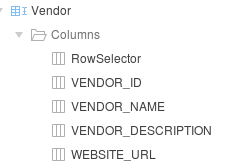
1. Have a ROW Selector column in the Interactive Grid
2. Create a Dynamic Action in the Grid, with the Event being 'Selection Change [Interactive Grid]'. Now this event is fired each time a selection is changed in the grid. I've disabled multi-select in my grid, but this approach works for multiple selections too.

3. In true action, select 'Execute Javascript Code' and type in the following code
if(this.data != null){
if(this.data.selectedRecords[0]!= null){
selectedRecord = this.data.selectedRecords[0][0];
console.log(selectedRecord);
}
}

How did I figure this out? Let's just simple do a console.log(this) on the 'Selection Change' Event.
Here's the screenshot of what is logged on the console.

this.data has selectedRecords, there you go!!! Had some trouble figuring that out! Phew!
Tags : Oracle APEX 5, Oracle APEX5 Interactive Grid selected row javascript, Oracle APEX5 Interactive Grid javascript listener, Oracle APEX5 Region Row Selection, APEX5 region javascript, Oracle APEX5 blog, Oracle APEX5 javascript Interactive grid
Use Case : Get selected row(s) from a region such as Interactive Grid/Interactive Report. APEX does not provide a declarative way to perform this operation in Javascript. I tried apex.item(), $v() etc. Nothing seemed to work out.
These are the steps I followed to get the selected selected row from the interactive grid in Oracle APEX.
1. Have a ROW Selector column in the Interactive Grid
2. Create a Dynamic Action in the Grid, with the Event being 'Selection Change [Interactive Grid]'. Now this event is fired each time a selection is changed in the grid. I've disabled multi-select in my grid, but this approach works for multiple selections too.
3. In true action, select 'Execute Javascript Code' and type in the following code
if(this.data != null){
if(this.data.selectedRecords[0]!= null){
selectedRecord = this.data.selectedRecords[0][0];
console.log(selectedRecord);
}
}
How did I figure this out? Let's just simple do a console.log(this) on the 'Selection Change' Event.
Here's the screenshot of what is logged on the console.

this.data has selectedRecords, there you go!!! Had some trouble figuring that out! Phew!
Tags : Oracle APEX 5, Oracle APEX5 Interactive Grid selected row javascript, Oracle APEX5 Interactive Grid javascript listener, Oracle APEX5 Region Row Selection, APEX5 region javascript, Oracle APEX5 blog, Oracle APEX5 javascript Interactive grid